Welcome to the Stampin' Llamas Holiday Blog Hop!!
Happy Thanksgiving! Merry Christmas! OK, it's a little early for that. But it's time to start thinking about holiday cards; if I don't start soon, I won't be mailing them until after New Year's!
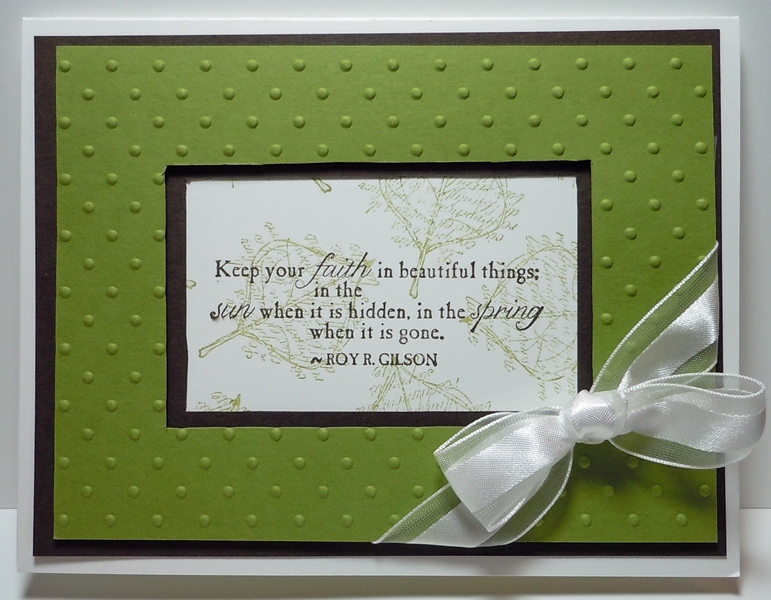
Following the order of the seasons, I will show you my fall/Thanksgiving card first.

Stampin' Up! products used:
Stamps: French Foliage, Day of Gratitude. Cardstock: Riding Hood Red, Old Olive, Pumpkin Pie, Very Vanilla. Ink: Riding Hood Red, Old Olive. Accessories: Antique Brads. Tools: Watercolor Wonder Crayons, 3/16" Corner punch, Decorative Label punch.
Other products: twine.
Stamps: French Foliage, Day of Gratitude. Cardstock: Riding Hood Red, Old Olive, Pumpkin Pie, Very Vanilla. Ink: Riding Hood Red, Old Olive. Accessories: Antique Brads. Tools: Watercolor Wonder Crayons, 3/16" Corner punch, Decorative Label punch.
Other products: twine.
I love, love, love the French Foliage set. And I had so much fun playing with this set with Watercolor Wonder Crayons. For this card, I used the crayons directly on the stamps. I used Real Red, Cajun Craze, a tiny bit of More Mustard, and some Old Olive and Garden Green and blended the colors together to look like fall leaves. After you've colored the stamp, lightly spritz it with water to activate the watercolors and stamp on watercolor paper. It takes a bit of practice to figure out the right amount of water to use; too much and your image is blotchy. Too little, and not all the color transfers. So if your first try doesn't look right, don't give up. Practice a little and you'll soon have beautiful leaves!
This next card uses the Christmas Lodge set from the Holiday mini.

Stampin' Up! products used:
Stamps: Christmas Lodge. Cardstock: Brushed Silver, Night of Navy, Whisper White. Ink: Versamark. Accessories: Silver Stampin' Emboss Powder, Whisper White Organza Ribbon. Tools: Big Shot, Top Note Big Shot die, Heat Tool, 3/16" Corner punch.
I heat embossed the lodge stamp and the Happy Holidays stamp with Silver Stampin' Emboss Powder. When you stamp the lodge on white paper, the "snow" is the correct color. However, on the Night of Navy paper, it doesn't look like snow. So I used Dazzling Details to color in all the snowy areas. I think it's perfect since a new snow glistens anyway! I used the Top Note die to cut both the Night of Navy and the Brushed Silver cardstock. I then carefully cut along the dotted line on the Night of Navy piece so that I could mat it with the Brushed Silver. For the Happy Holidays piece, I used the corner rounder punch so that it "matched" the flowing lines of the top note die. It looked a bit naked on its own, so I used a bit of Whisper White Organza ribbon to help set it off.
My last project is a gift card holder!
My last project is a gift card holder!
Outside:

Open the first fold:

Fully Opened:

Another angle, to see the fully opened card:

Stampin' Up! Products Used:
Stamps: Forest Festivities. Cardstock: Old Olive, Real Red, Tempting Turquoise, Whisper White. Ink: Black StazOn, Daffodil Delight, Early Espresso, Old Olive, Pumpkin Pie, Real Red, Rich Razzleberry, Soft Suede, Tempting Turquoise. Tools: Simply Scored Scoring Tool, 1-3/4" Scallop Circle punch, 1-3/8" Circle punch, Word Window punch, Sticky Strip, Blender Pens.
Stamps: Forest Festivities. Cardstock: Old Olive, Real Red, Tempting Turquoise, Whisper White. Ink: Black StazOn, Daffodil Delight, Early Espresso, Old Olive, Pumpkin Pie, Real Red, Rich Razzleberry, Soft Suede, Tempting Turquoise. Tools: Simply Scored Scoring Tool, 1-3/4" Scallop Circle punch, 1-3/8" Circle punch, Word Window punch, Sticky Strip, Blender Pens.
I used several images from the Forest Festivities set and colored them with Blender Pens. I will post a (free) tutorial later this week on how to make this gift card holder.
I hope you enjoyed my projects!! Next up on the Stampin' Llamas Holiday Blog hop is Jackie! Thanks for visiting and have a great day!